Quick and Easy Chocolate Cake (Dairy and Egg Free!)

I woke up this morning thinking I would wear black in mourning as today is election day and I was feeling less than excited and optimistic. But I decided I would eat something black instead, or almost black as I decided today was a day for chocolate. A day for chocolate indeed!dsc06026

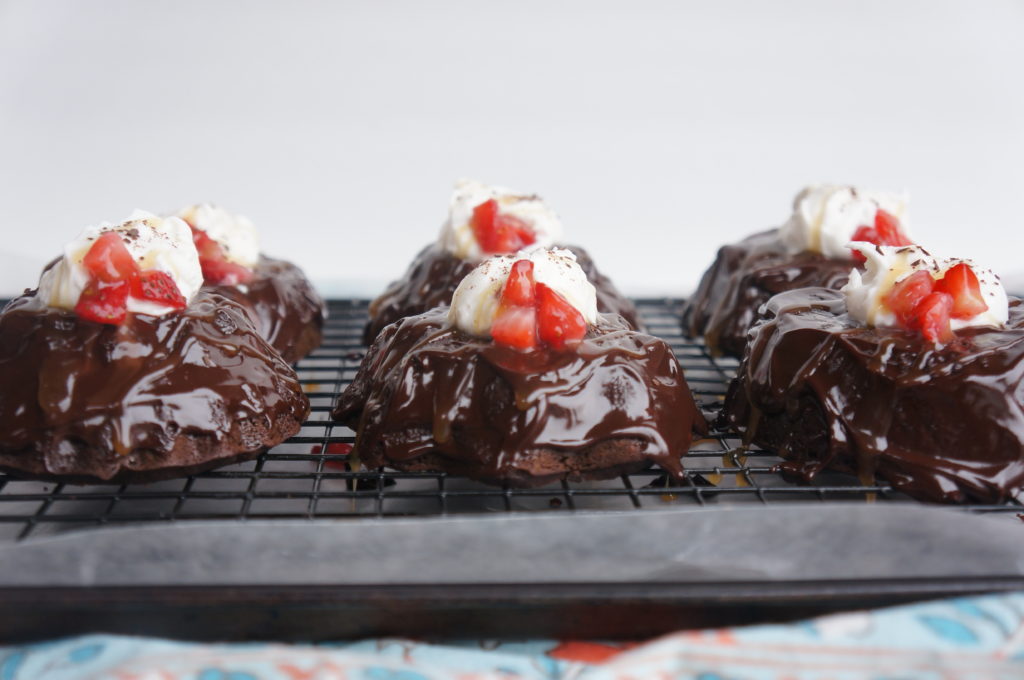
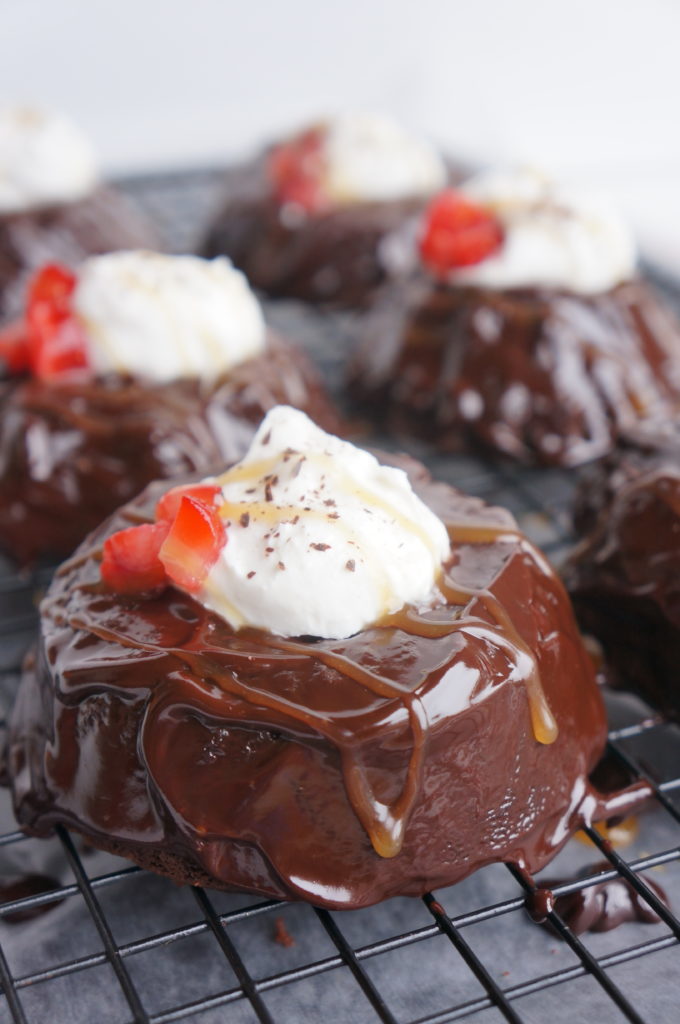
I love exercising my great privilege to vote and will do that today, but it is with a heavy heart. How did our country get so far off track? No matter what way I look at it, there is no happy outcome. Such terrible, terrible choices and it all makes me sick. Luckily, this cake I decided to make brought me some much needed sweetness today and a reason to smile! I DROWNED the cake in chocolate (ganache) and drizzled with caramel sauce. because it’s homemade caramel sauce. and few things are more delicious than that.

dsc06020

It was so funny as I was commiserating with my sister about today and I was telling her I was going to make chocolate cake in my mourning state, it suddenly clicked why I felt drawn to make this chocolate cake recipe. This happens to be my go-to chocolate cake. the cake you make when you don’t have any time but need cake. or the cake you make when you have all the time in the world and want a yummy cake. but another name for this particular cake that I suddenly rememembered is that it is also called DEPRESSION CAKE.  !! coincidence? I think not! Definite food inspiration happening over here! hahahaha!

dsc06014

This cake was created in the time of the Great Depression when things like butter, milk, and eggs were scarce and too expensive to buy. Well, they got creative and discovered that you can have a perfectly moist and fluffy cake even without those ingredients! This is also makes it perfect for those with food allergies without having to sacrifice flavor or texture.

dsc06023

And you’ve heard of “One Bowl Chocolate Cake” right? Well how about this– “No Bowl Chocolate Cake!” I’m serious, you can mix the ingredients right in the pan without having to clean one single bowl. Crazy, right? No wonder they also call it wacky cake. Wacky good and amazing. and the perfect cake for any day of the week. but most especially for election day 2016. 😉

Quick and Easy Chocolate Cake
 
This cake goes by many names-- Depression Cake, Wacky Cake, War Cake--but no matter what you call it, it will be the easiest and quickest chocolate cake you will ever make, that smells delicious as it's cooking and tastes even better once it enters your mouth. It is also the perfect cake to have in your back pocket since this cake uses NO MILK, NO EGGS, and NO BUTTER. It will leave you wondering why you ever crack open a box of cake mix when baking a cake is this easy!
By:
Ingredients
  • 1½ cups all purpose flour
  • ½ - 1 cup sugar*
  • ¼ cup cocoa powder
  • 1 tsp baking soda
  • ½ tsp salt
  • 6 Tbsp neutral oil (or I have used coconut oil with success too)
  • 1 tsp pure vanilla extract
  • 1 Tbsp white vinegar
  • 1 cup cold water
Instructions
  1. Preheat oven to 350 degrees F.
  2. In an 8 inch square pan** whisk together the dry ingredients.
  3. Make a well in the center and add the oil, vanilla, vinegar, and water and whisk until combined
  4. Bake for 35-40 minutes until toothpick comes out mostly clean (or the way I check-- lightly press the center with your finger. If it remains indented let it cook a bit longer. If it bounces back it's done!).
  5. Let it cool completely in pan on a wire rack (or remove and put on wire rack if you cooked it in a different greased pan or made cupcakes).
  6. If desired, top with your favorite frosting or ganache (I went a little crazy with it today, but it seriously doesn't even need anything!).
  7. Make sure to tell everyone it took you ALL DAY LONG to make this cake. then laugh to yourself inside. then hand them the recipe to this cake so they can know your secret.
Notes
*Usual recipes for this type of cake call for 1 cup sugar, but I find most desserts overly sweet. I cut the amount down and find that even just ½ cup sugar is plenty sweet for me, but feel free to use the full 1 cup if you desire!

**I had these mini bundt cake pans that I wanted to use so I mixed the batter in a separate bowl and poured it into my greased pans, so that I could easy pop them out and invert. In 6 mini bundt pans, they cooked for approximately 20 minutes. You can also make them into cupcakes, checking for doneness after 18 minutes)


Halloween Costumes 2015- Toy Story (Part 1)

2015-10-30-11-28-53

Stopping by the hubby’s office on Halloween day! I didn’t want to be driving and walking around during the day during in a hoop skirt, but you will see my real skirt below!

It is hard as a parent to not completely give in to all your child’s interests and favorite things. Henry is a hard core major Toy Story fan, and seriously, I think it is pretty cute! So I wasn’t too opposed to the idea of a Toy Story theme when he said he wanted to be both Woody and Buzz Lightyear (naturally). I had a lot of fun making all these costumes. Other than my bonnet, there really wasn’t anything in particular that gave me real grief like past years, it just took a lot of time putting them all together. Let’s begin with Woody, shall we?

2015-10-23-01-07-48

I made this actually as just an everyday dress-up costume not as his “official” costume, hence no yellow shirt or spurs or other things I would have added had it been his real costume. I decided to make him a woody vest which I figured would be practice for making the hubby’s vest (who would be Woody on actual Halloween). Luckily, I remembered my frustrations with years past and I followed a tutorial. I believe it was this one (although I did not need it to be reversible and I left off the fake pockets). Much smoother sailing doing it right the first time and following a tutorial wasn’t as intimidating as I thought it would be! I also got the nicer faux cow print (that’s soft material) from the fabric store which really makes it look so much nicer than just the fake cotton cow print would have been. No fraying either or ironing needed, always a plus in my book.

2015-10-23-01-09-47

Finishing it off is a brown hat from dollar tree, a toy gun, some rope I had around the house for a lasso, cowboy boots I got for both kids (from Target on sale for $14– score!), and a bandana. I looked at dollar tree for sheriff badge, but they only had a tiny one which I thought looked a little silly. So I cut my own badge and belt buckle out of cardboard and painted it with gold paint. The cardboard definitely elevates it. 😉 haha! I attached elastic to the back of the belt buckle and just slid it right onto the belt before buckling. Everything was the same on Jesse except he got a western shirt and ironically I ran out of time to make the vest with a lining, so it is only the outside cow print I sewed together! unfortunately because of this it was rather thin and didn’t lay very nice (and looked cheaply done… whoops! I shouldn’t have saved that for last!).

2015-10-23-14-13-31

I always seem to have a favorite costume or costume part every year. Jane’s “Jessie Cowgirl” costume was definitely my favorite. Even before I tried it on her, just laying it out on a table looked cute!!

2015-10-23-01-06-16

I had an old shirt of Henry’s which had a lot of stains at the top which was perfect for this because it would be covered up and giving it another use! I brought in the sides a bit so it didn’t look so big, and then I attached yellow felt with “Heat N Bond”— which since then I have discovered “Wonder Under” which does the same thing but it is way cheaper. I cut a fake collar out of white felt (I actually think I used some pellon I had which has a fusible side) and hot glued some sparkly red sequin ribbon (I really do look at the originals and try to copy certain things closely, and funny how I even made that swirly design the same!). Since nothing was attached on the back of the shirt, she was still able to stretch it to get it on and off. I got some oversized buttons which I should have sewn on, but you know, I have a special bond with my glue gun so that’s what I did (but they were always verging on falling off and one just did this year).

2015-10-23-01-06-19

The ends of her sleeves are my favorite. I cut a long rectangle of yellow felt and measured it around her arm, allowing extra room. glued on some sequin ribbon, then attached snaps! That was something I always was intimidated by but found out it’s incredibly simple and quick! These instructions helped me. I glued in three strips of white ribbon folded over on each side and done! The skirt was just your basic skirt—- measure the length you want, measure around the waist and double it (if you want a little fullness and poof), then I hemmed up the jean bottom, cow print didnt need hemming (hooray!), Then I folded down the top (allowing enough room for elastic to fit) and sewed almost all the way around.  Insert the elastic (I always attach a safety pin to the end so it is easy to feel and move it down, sewed the elastic together and sew the small opening closed. I loved this skirt! And I like how it made it more girly, than just doing a pair of jeans with cow print on the front, like the actual character.

2015-10-23-01-09-14

Of all times for dollar tree to not carry red cowgirl hats, i had to resort to option B (which I was pleasantly surprised cost under $10). We really save so much money making the costumes that I feel okay buying certain components, and I feel like the official jessie cowgirl hat really completely the outfit! I thought they made a pretty cute woody and jessie pair.

2015-10-28-16-10-03

Those aren’t my pink legs… Someone thought my skirt was a really fun tent! I couldnt keep her out of it!

The assembly of Little Bo Peep was rather humorous, I wish I had a picture of the shirt without the sweater because it was quite funny how it was pieced together. I found a blue shirt in my pass-on pile and had some pink fabric which i just attached with Heat N Bond, leaving a space in the middle. I didn’t have much pink fabric in my stash, so I only covered up the parts I knew would show with a sweater on. I glued on some white satin ribbon going down both sides were the pink meets the blue, and then zig zagged them back and forth all the way down. For my skirt, I asked one of the workers at the fabric store for recommendations for a cheap nicer-looking fabric that would be good for a skirt and she led me to some fabric in the bridal section. 😉  I can’t remember how many times I multiplied it around my waist, but it had to be quite large so that I could fit a hoop skirt under there! Because so much material was gathered at the top, I actually used a string where I would normally place the elastic, lined up the fabric how I wanted it to lay on me, and then I sewed elastic right on top of it so all the gathers would be in place. I found pink polka dot fabric in clearance which I used over the white skirt, added some pink dots with the heat n bond, added a pink sweater (It would have been easier if I had a pink shirt to begin with so then I would only be covering up a small section with blue, but I had to do it kind of backwards since a blue shirt was what I had). For the hat, I eventually looked at tutorials and got it figured out (I just looked up “pioneer bonnet tututorial” and lots came up).

2015-10-22-15-35-21-1

For Little Bo Peep’s sheep, we already had some cream fleece pants, and I picked up two very soft towels from dollar tree which I thought would be perfect for a lamb (I think it was a towel actually meant for car washing… haha!). I folded on in half, cut a hole at the top for her head, then sewed up the sides and out for arms. I somehow managed to piece together a hat from the same material as well, adding a pink ribbon to tie and little ears colored with a pink marker. Pink paint would have been better I think because the marker kept rubbing off! But, it worked. I used some thin and stretchy black socks I had, cut them in half and sewed them closed, and covered up her hands and feet with these (the picture above was taken just to see how it would all look, hence the not pulled up sock on her hand and the orange onesie underneath that is showing!).

2015-10-31-18-28-51 
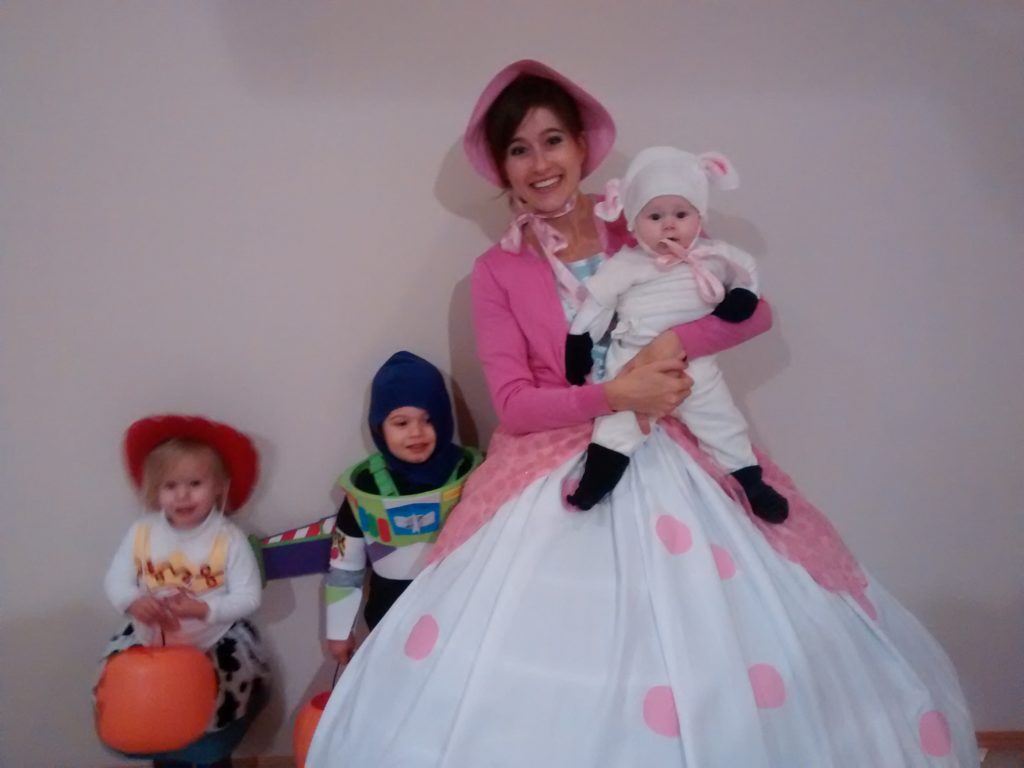
Unfortunately we did not get any good family pictures this year! So sad! Stay tuned for Toy Story Costumes Part 2 when I go over the creation of Buzz Lightyear! Can you guess what his costume is made from?


Halloween Costumes 2014- Little Red Riding Hood and Clan

I promise I will get back to posting about food and other things real soon! We are just in full Halloween mode over here which means lots of costume-making! I have one more year to get caught up and then I’ll post this year’s! And then I will post a recipe for you all. What would you like me to post first– Chocolate Sorbet or Taquitos? Comment below and that’s what I will do!dsc03236

This was the first year we had a full family themed costume, and Little Red Riding Hood was a good choice for a family of four!

dsc03227

First up, Little Red and her woodsman father. You can’t tell in this picture but the hood actually goes up to a point like a little pixie. This cape was shockingly difficult, and next time (as usual) it would definitely be easier to follow some tutorial.  I had to redo it so many times! As for the Father, funny thing was at this time Duck Dynasty was really popular, and lots people came up to the hubs saying “So cool! You’re Jase!” Or Willie or one of those characters, I can’t even remember now which one it was. I thought it was pretty obvious what we were and especially when we were all together, but we sure had people scratching their heads and asking who we were supposed to be! Jesse had big hunting plans for that winter, so I actually ordered him a real freezing weather hat which he later used. It’s nice when things can serve a dual purpose! And it seriously was only about $10-$15 more than the “costume” woodsman hats, so certainly worth it. And it definitely looks better with ear flaps up. 😉

img_20141028_145545388
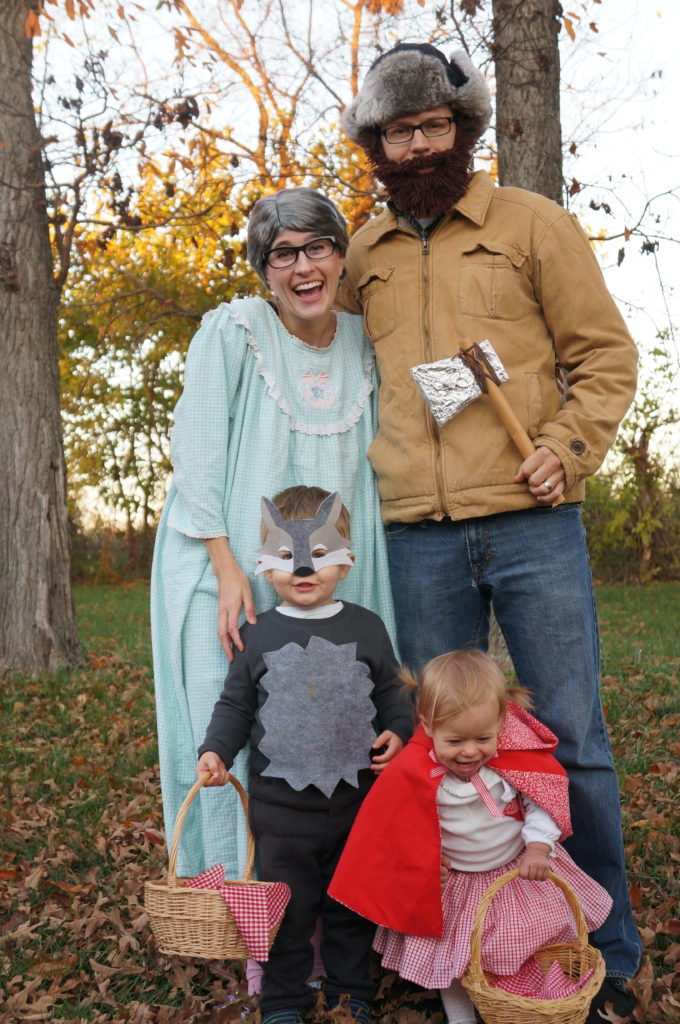
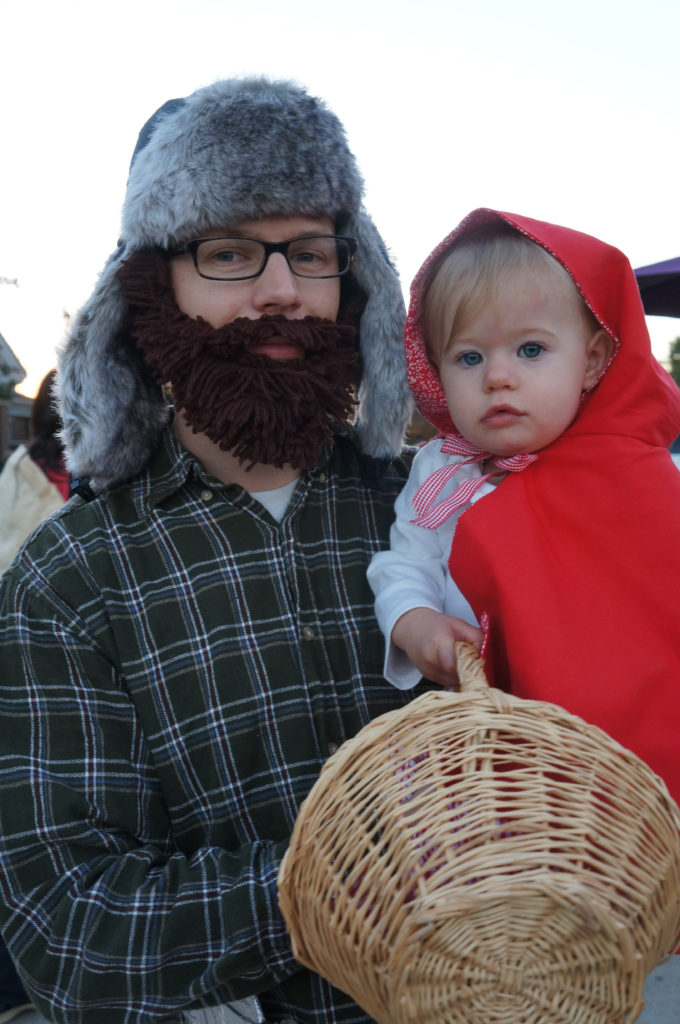
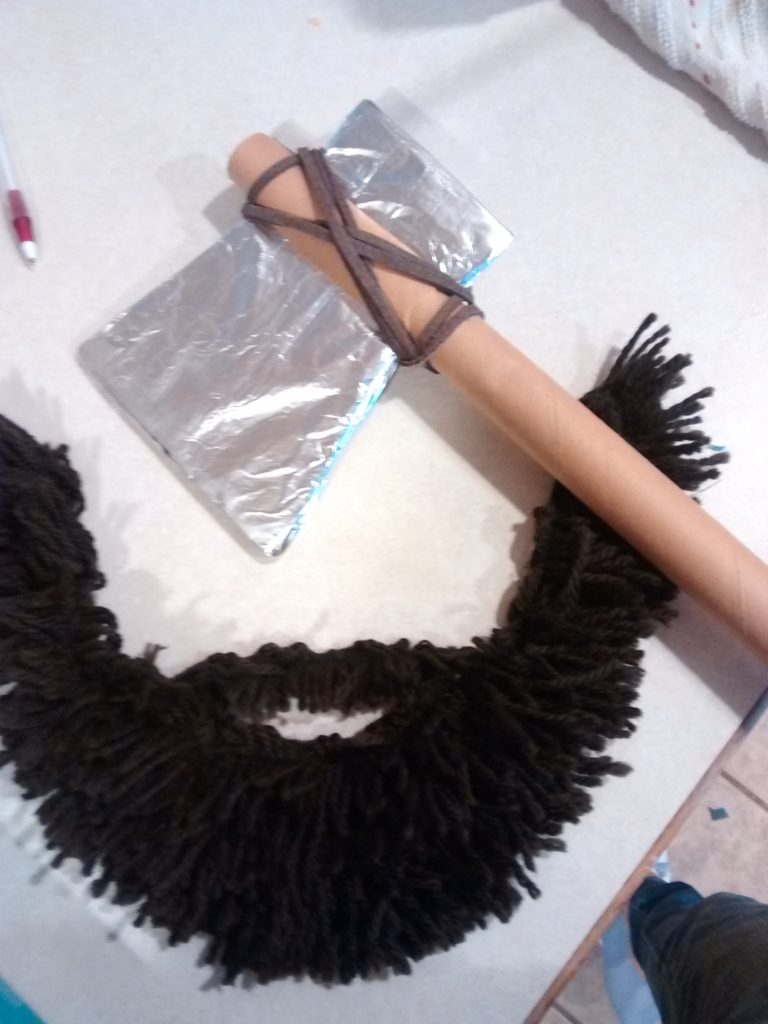
Terrible picture I know, but this shows his beard and hatchet. I had brown felt that I cut as the beard/moustache, and then did rows of yarn, folding back and forth and sewing row by row, and then cutting at the bottom folds to make loose hairs. At the top I attached elastic which looped around his ears to stay on. I’ll be honest, a lot of times it is worth it to make something instead of buying, but if I had a redo, I would totally buy! It actually took a lot of time and work. The hatchet was the inner part of the paper towel roll (yep, I’m still collecting those dad… 😉 They can always be turned into something!).  I cut a piece of cardboard into the shape of a blade and covered with foil, then cut out a very narrow strip on each side of the tube to slide the blade in. The final touch was a leather shoelace actually from a pair of moccasins Jesse was throwing out (can you understand why I have hoarding tendencies?? Everything throw-out-able can be turned into creations!!).

img_20141029_175058531
It took my a while to figure out the mask design for the not-so-bad-wolf. I used a sheet of stiff gray felt (that they sell at hobby lobby) as the base, then used wonder-under (which has adhesive on both sides which can be ironed on) to attach the other pieces on top. Because I covered his nose and I accidentally cut the elastic too short (and too lazy to redo), his nose was a liiitle squished!

dsc03231
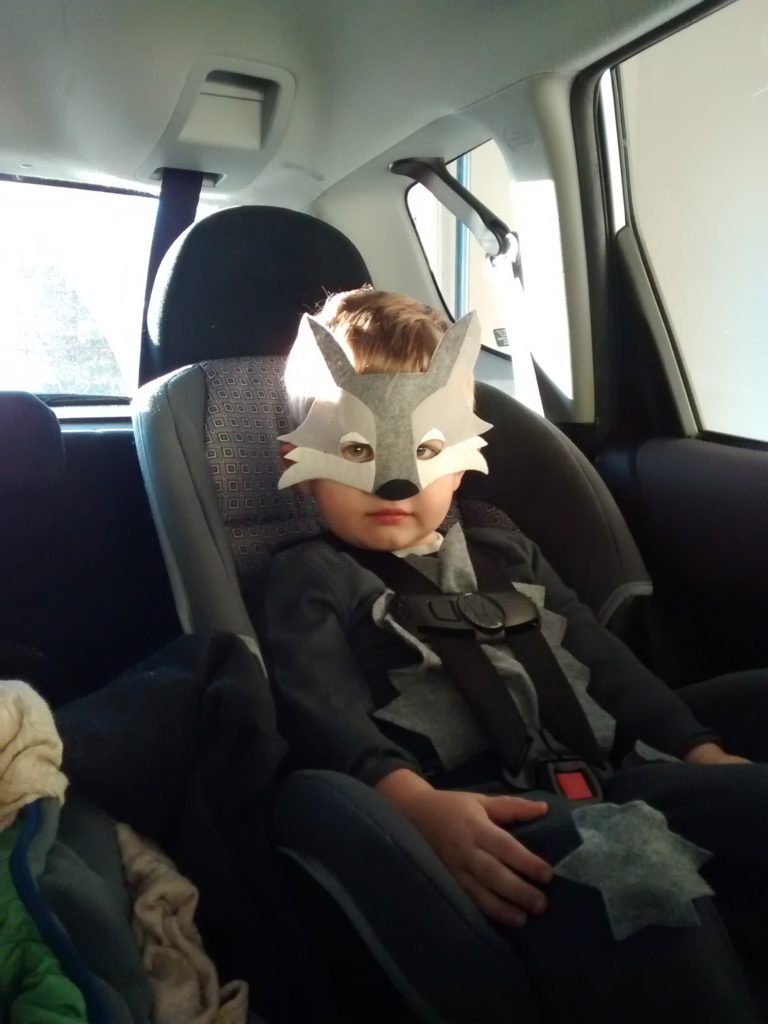
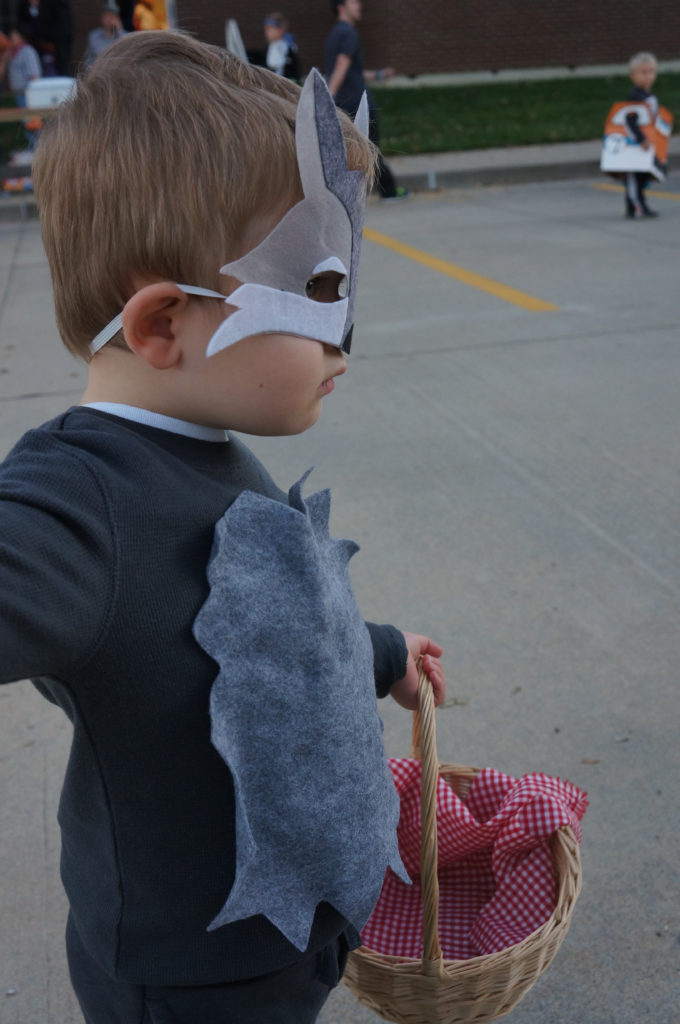
The rest of his outfit was easy– gray shirt and pants and loosely  hand stitched on some lighter gray felt pieces on the belly and knees, which I was able to easily remove after Halloween so he could wear the clothes.

dsc03233

I love alternative candy-collecting receptacles. I thought little baskets lined with gingham were perfect. As for my outfit, I got my nightgown and glasses from goodwill, wore some slippers, and ordered my wig and nightcap/bonnet online. I was going to make the nightcap, but seeing how the cape and beard took way longer than planned I ran out of time! But i figured I would be able to use it again for future costumes. I’m bummed thought that I forgot to put it on in the pictures at the top on the grass!
dsc03226 
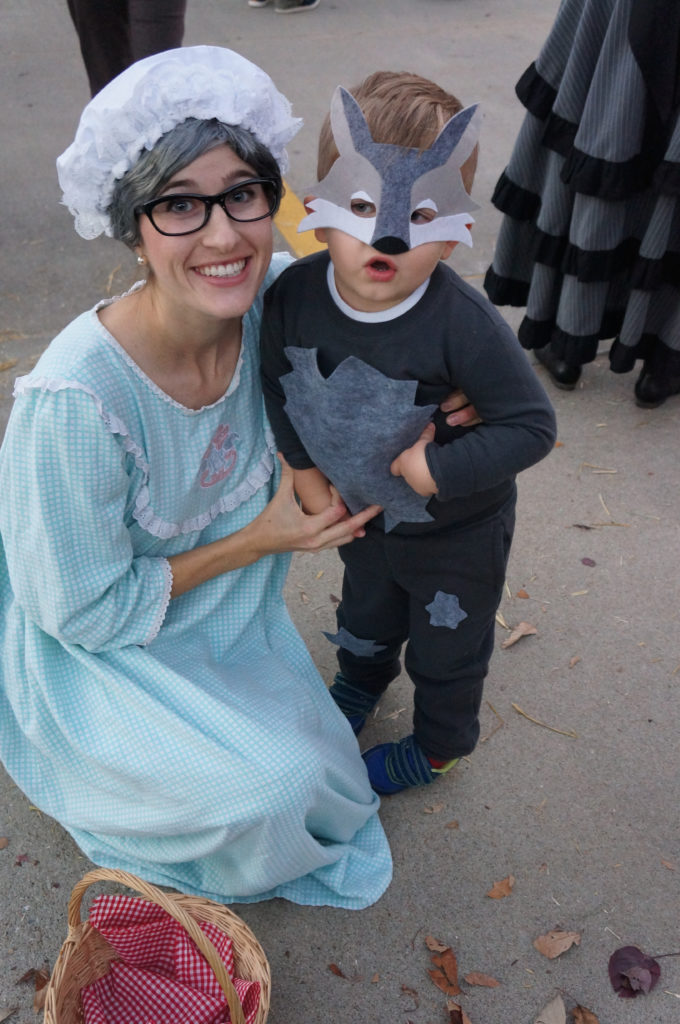
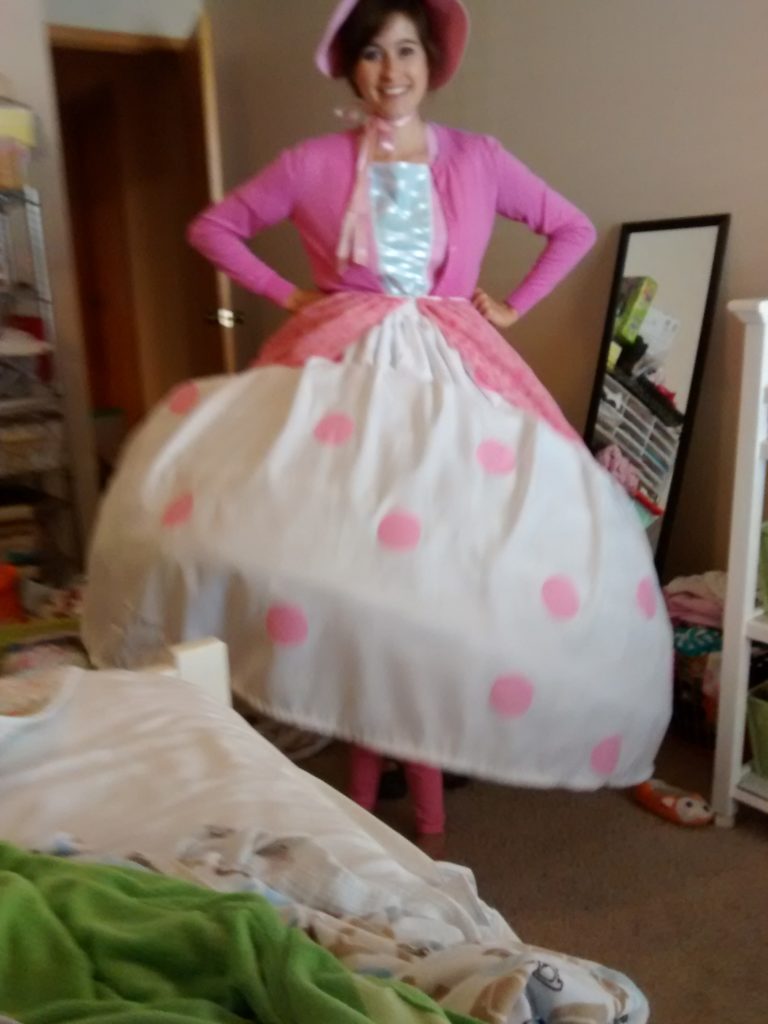
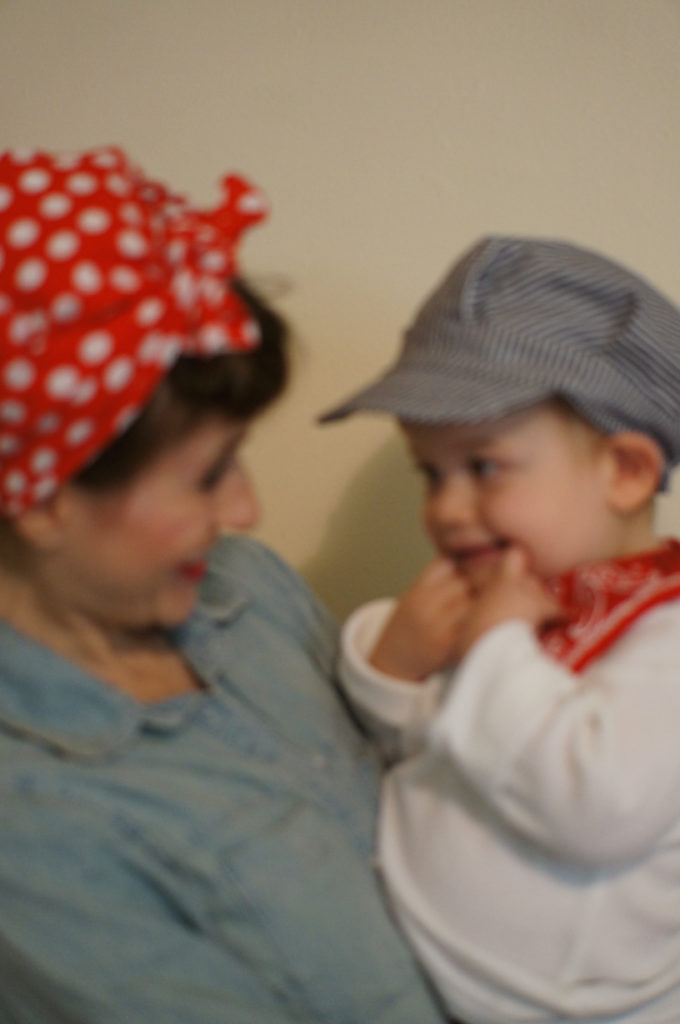
The funniest comment I got was when some (rather obnoxious) teenagers came to our house trick or treating and they asked “Who are you supposed to be? A mom??” Thank a lot! It did give me a good laugh though. Yeah, we stay at home moms just stay in our jammies allll day loong. And look like grannies.


Halloween Costumes 2013- Train, Rosie the Riveter, and a Flower

dsc00470

As I’ve been going through past Halloween costumes, I can’t help but think that each year is my favorite! 😉 Living in Kansas City at the time, train tracks and real cargo-carrying trains were in full function all around. Every time we went to the park, we would see at least one set of trains pass by. Our two-year old boy would get so excited every time he would see or hear a train that I thought it would be fun to make him into a little train conductor with an attached train for Halloween!

dsc00484

He was pretty excited. 🙂 I didn’t start on this one until I believe the week of Halloween, so I remember staying up well past midnight the night before a neighborhood trunk or treat event, in a mess of hot glue and duct tape, to get it all finished up!

dsc00463

I found lots of ideas from pictures on Pinterest (many were thomas the train) which helped in the construction and there was one in particular that I used for the design, which can be found here (I wish I had gotten pictures of Henry on the train tracks like they did! So cute! but alas, I just ran out of time).

dsc00455

As for the construction, it starts with a diaper box! I tucked the flaps in except the flaps in back. The front box is a cereal box laying flat, the round part in front (sorry, don’t know the technical train term hah!) is a cut off oatmeal box with a funnel (from dollar tree) that was pushed into the box and attached (I really wanted a gold or silver one, but couldn’t find one and I didn’t think of just spray-painting it at the time). The back part is butter boxes. I covered all these different parts separately with the black duct tape first, although it would have been more secure if I had taped them down to the diaper box first, and then do the nice tape to cover it all. As it was, I just hot-glued the taped pieces, and they did have some issues peeling off.

dsc00480
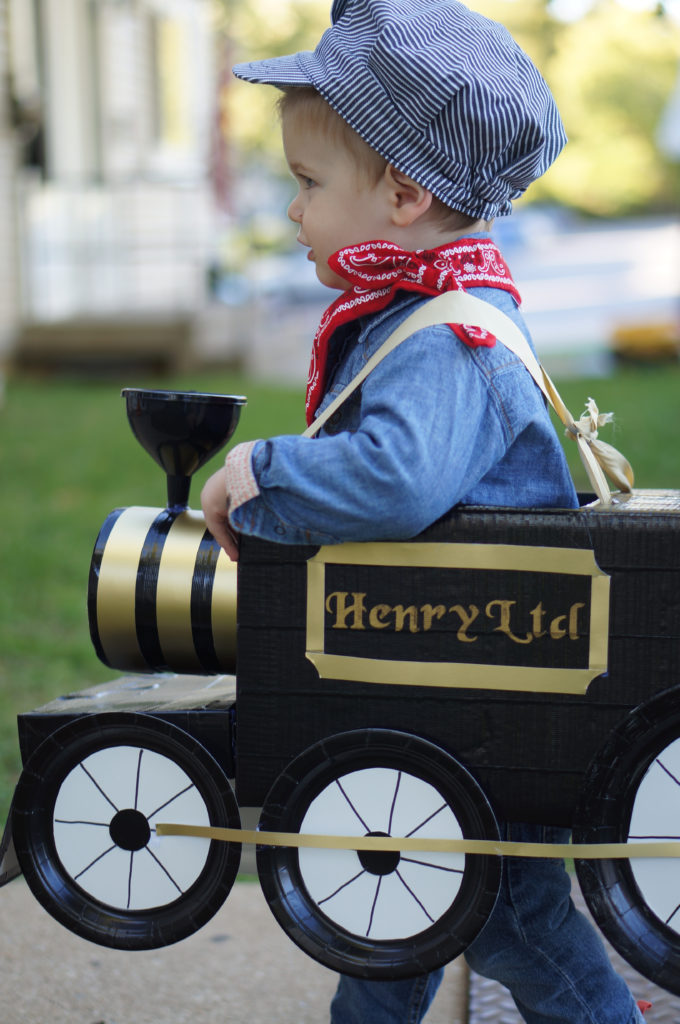
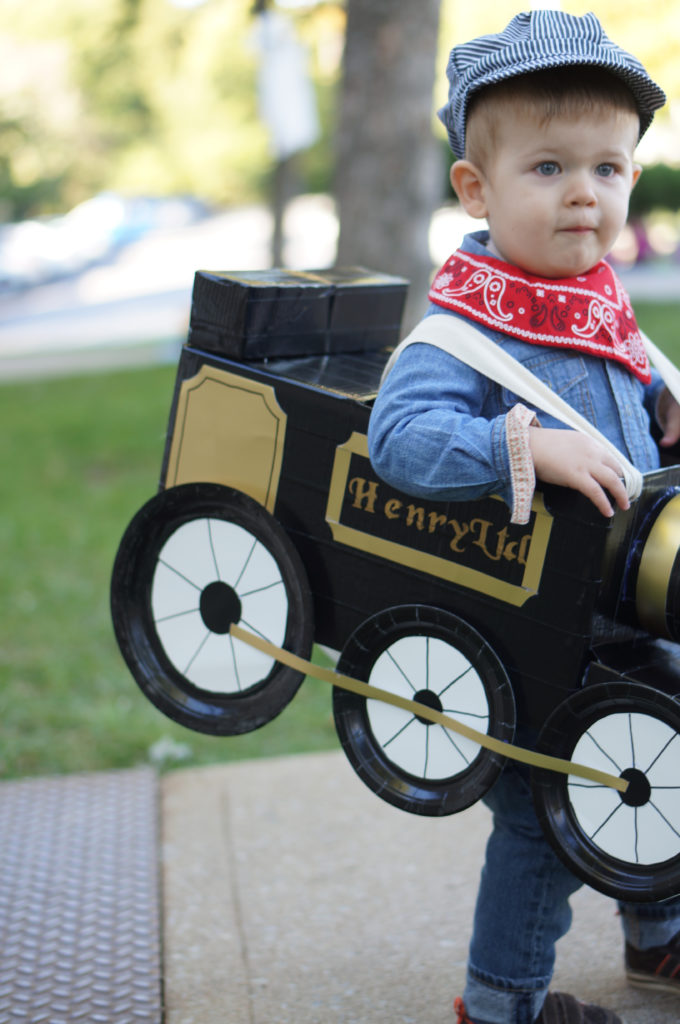
On the first trial run with the train on Henry, the straps were too far apart and he kept pulling them off (since they were pretty much coming off on their own any way).  I realized I needed to criss-cross them in back and make them a little longer which helped solve the problem.

dsc00476 
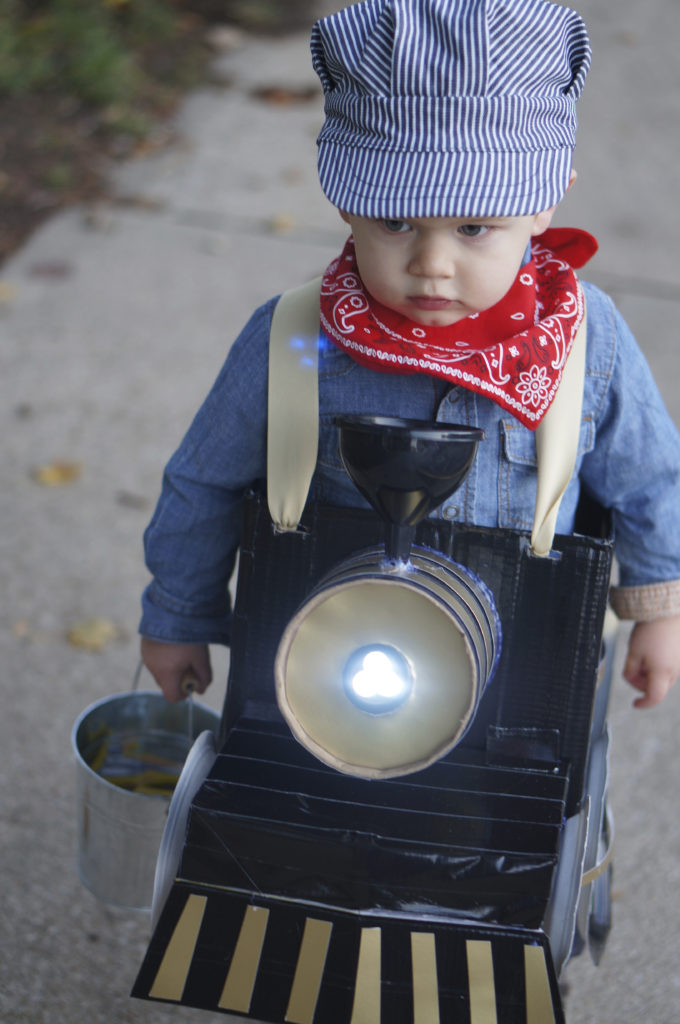
I bought a gold posterboard and cut it up for decorating. I stenciled “Henry Ltd” on the side and a “2” on the back (since he was two years old) with some gold paint. Black paper plates, with white paper circles inside made the wheels, attached with a strip of the gold posterboard, I picked up a set from Toys R Us (it was either $7 or $9 dollars) which included the train conductor hat, bandana, and train whistle. It was so cute him trying to so hard to blow and make a whistle sound! His very cute cousin is so sweet to pass on his clothes to Henry, so this adorable jean shirt was from him and worked perfectly.

dsc00497
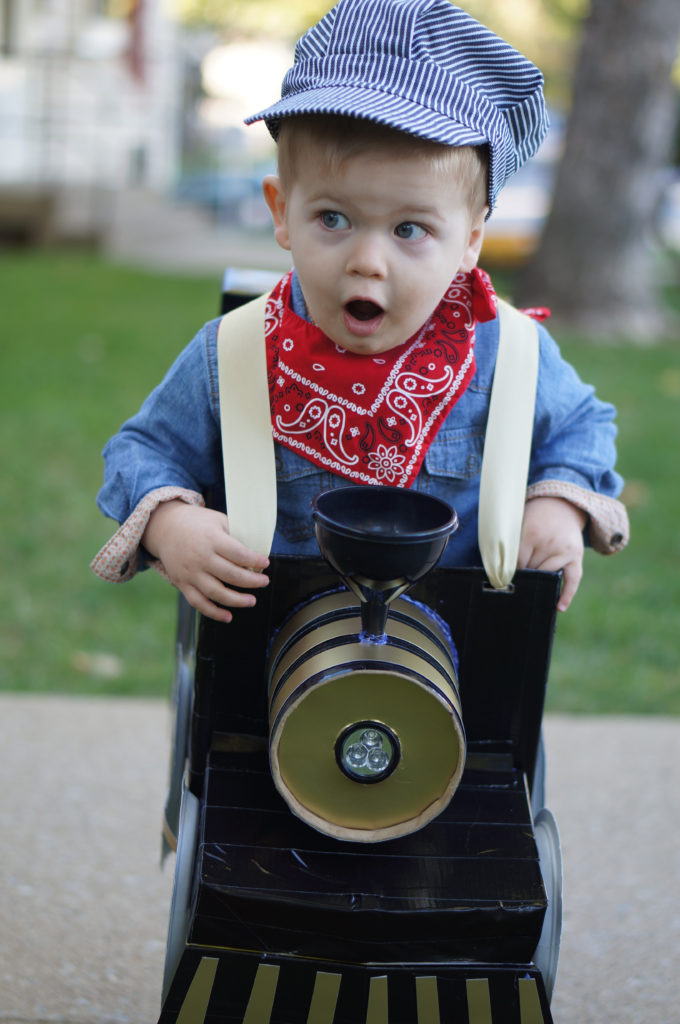
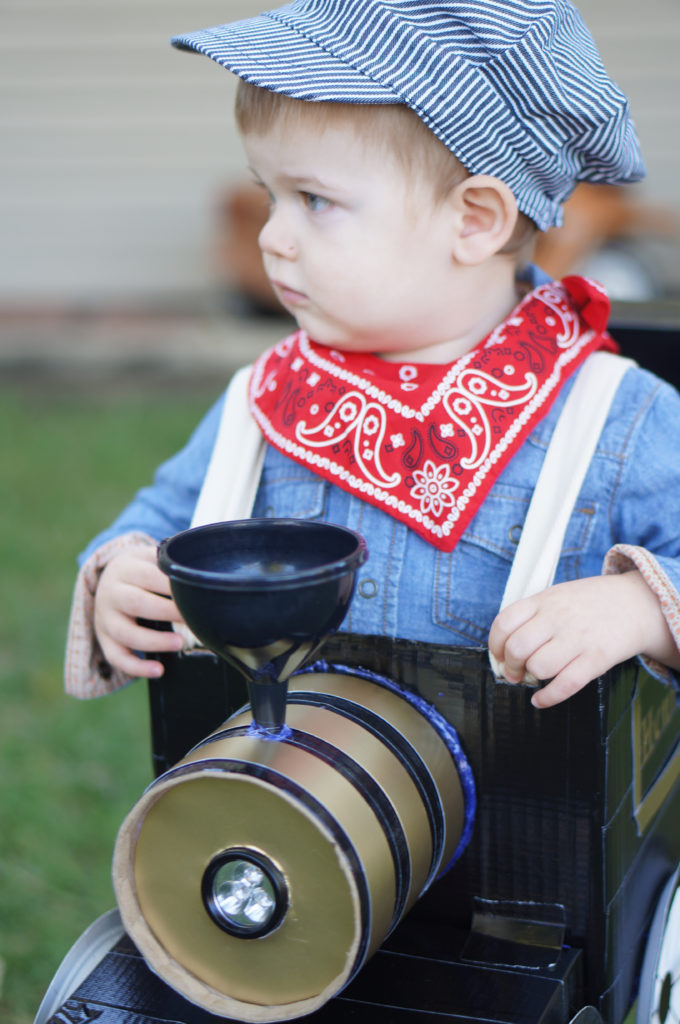
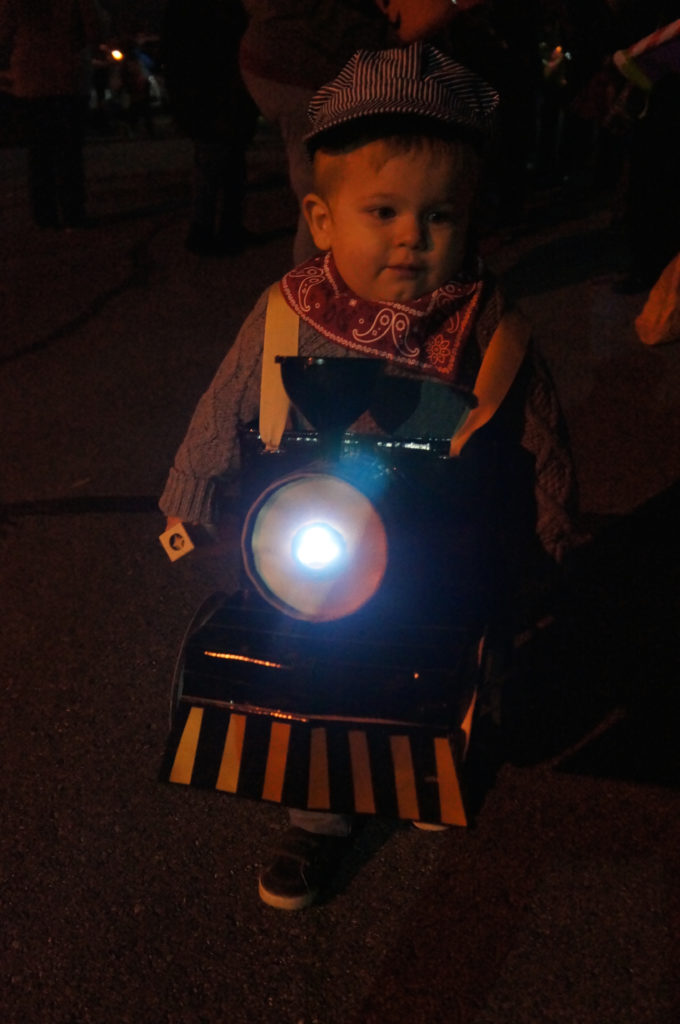
But I must say my very favorite feature of the costume was the flashlight. My mother-in-law came out for a visit right before Halloween and when I told her I was planning on making a train costume, she suggested it would be fun if I attached a light to the front. Such a fun idea! I cut a small hole just big enough for the flashlight to go through but be snug, and Henry thought it was the greatest thing putting his hand through the oatmeal box part and getting to turn it on and off!
dsc00504

Plus look how dark it is! He definitely needed that light. This was a few days before Halloween, at a Trunk-or-Treat event.

Moving on to the other costumes… (and apologies for blurry photos, I was trying to take pictures by myself with a tripod and apparently I couldn’t get it focused!)

dsc00573

Rosie the Riveter! Such a fun easy costume to put together. jeans, jean shirt, red polka dot fabric that I just tied up on my head, swirly bangs and red lipstick. Done!

Image result

I think it looks pretty close, although I don’t look quite as tough (or muscular, ahem). When I think of riveters it remind me of middle school when I used to be in drama and one of the musicals we did took place during WWII. Although I was cast as the unassuming secretary that turns out to be a spy, I still remember singing the riveter song–“rat-a-tat-tat that rivet guuu-uun, rat-a-tat-tat that rivet huuu-uun” and the riveters wore overalls and carried tin pails.

dsc00584

dsc00585

I kinda thought we seemed a bit coordinated in our costumes– jeans, red and white bandanas… He’s my buddy.

dsc00627

For Jane’s costume I had seen this picture hereand thought it looked so cute and simple. Not sure how Jane felt about it though… 😉 I didn’t want to waste a onesie on the costume, so I just loosely hand stitched the felt stem and leaves so that I could easily cut it off after. She happened to have these brown pants and the mega huge flower bow which worked great.

dsc00608

This must have been the year Jesse went as a “dental resident on his day off” haha! Don’t worry, the next year I rope him into the fun.

dsc00617

A serious trick-or-treater. Henry loved the sound it made as the candy hit the tin pail! And seriously, I have such a internal struggle with Halloween and candy. I seriously want to be that family that passes out toothbrushes or apples…but alas, we don’t. Or have you seen those honey sticks at farmer’s markets? That would be perfect! I would feel good passing those out. 🙂

dsc00619 Enjoying his spoils. 🙂 I let Henry pick out one thing and the rest got tossed in the bowl with the other candy to pass out. Funny enough, he happened to go for the cheese puffs, not even the candy! haha!! Another year done!
dsc00525


Halloween Costumes 2012- Pinocchio

dsc06909

2012 was a good year for Henry’s costume and I put a bit more effort into it compared to the mouse costume! I think others were a bit dubious about how his costume would turn out and were wondering why I wanted him to be Pinocchio! But I think they quite understood once they saw it complete.

dsc06969

I was actually planning to go on a trip to California mid October and getting back right before Halloween, so I was in a bit of a panic when I still hadn’t finished it when I was supposed to leave! My sister told me to just bring my stuff with and I could finish it there.

dsc06972-version-2

Well, my “little bit left” to finish turned out to take quite a bit of time, and my sister was so cute letting me use her sewing machine and even helping me by making his hat! We realized you actually need more than one small felt piece to make a proper hat but that was all I had brought, so she made it work! I think she did a most excellent job. She sewed on a satin scrap left over from the bow tie and added a red feather made out of felt.

dsc06911

Henry luckily happened to have a yellow shirt, I made a white peter pan-type collar that tied together in front in the middle (cut in a big “C” shape with ends almost touching), I backed up some blue satin fabric with fusible interfacing so I wouldn’t have a fraying issue and could eliminate having to do any sewing on the oversized bowtie (I hot glued it together and glued some elastic to wrap under his yellow collar to attach), and that just left me with a vest and the lederhosen part.

dsc06875 
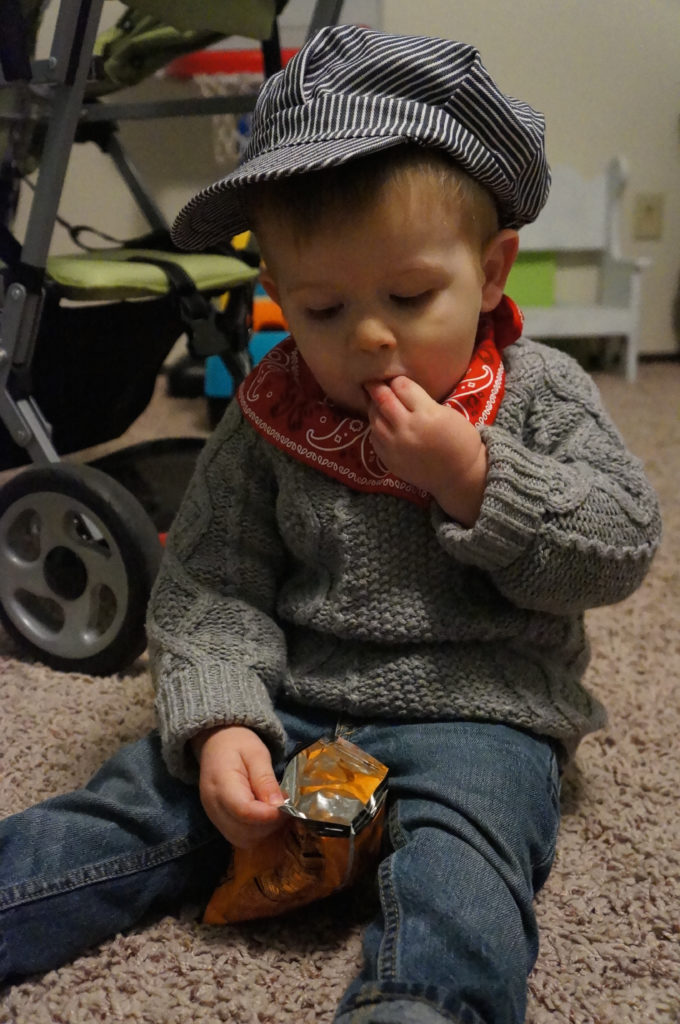
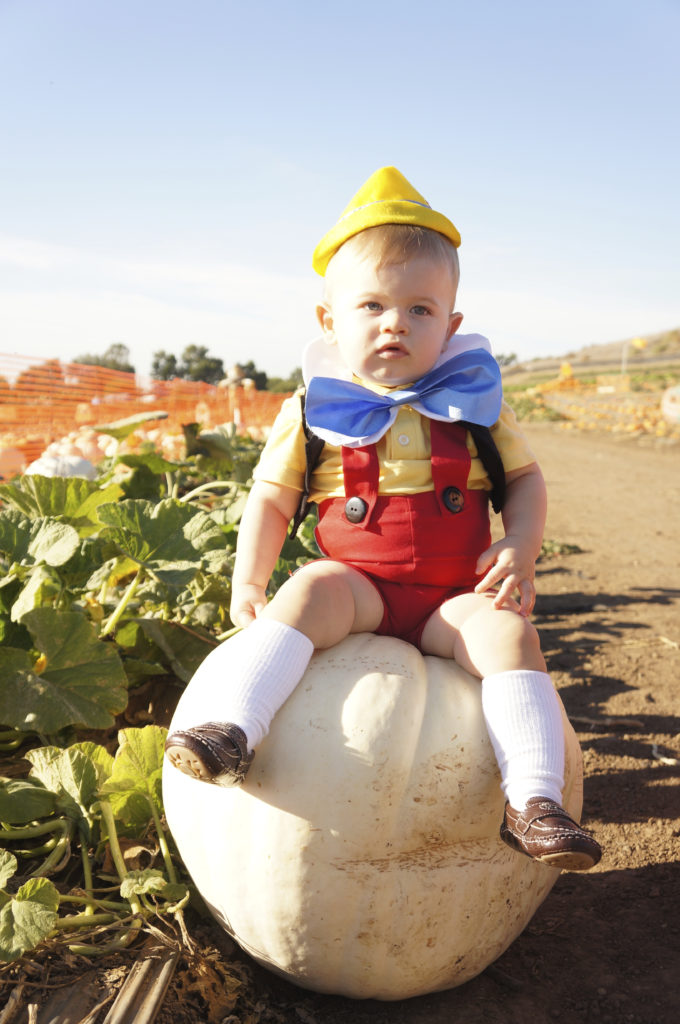
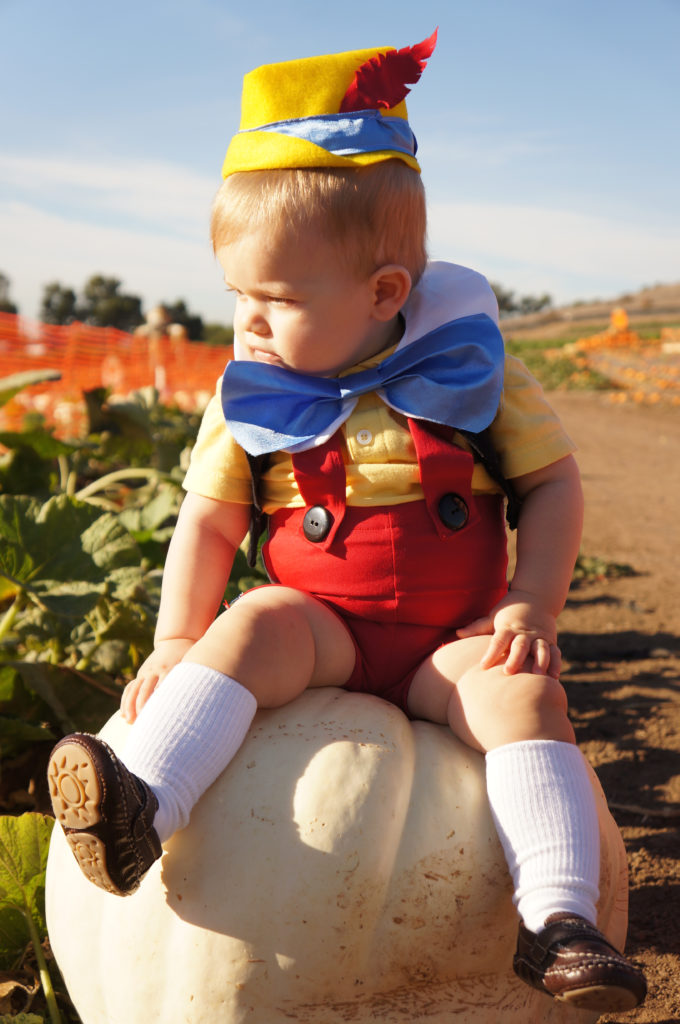
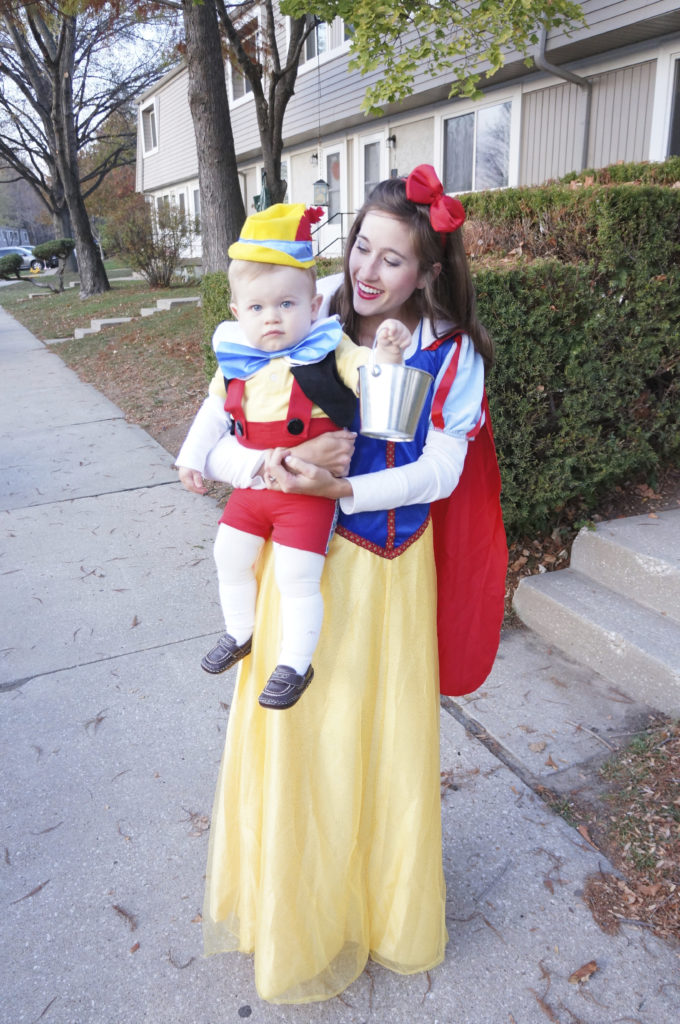
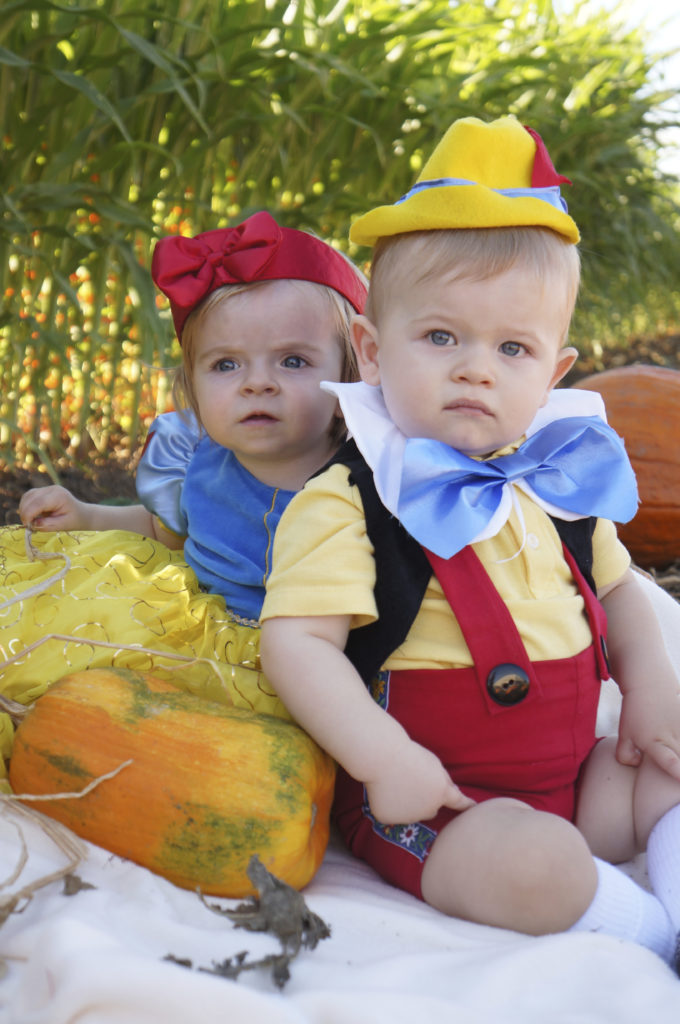
Aren’t Henry and his Snow White cousin just the cutest?! I love how serious and pensive they both look! haha! And I love how the colors on their costumes totally matched– all blue, yellow, and red! 

dsc06972

Is it possible for those chunky thighs to be any juicier?! I don’t think so! And the dimpled knees!!

That vest, oh, that vest! I feel like my sewing skills aren’t good enough to follow a pattern so usually I just “wing it” and make it up as I go, but this vest would have much easier I’m sure if I had followed some vest tutorial because it turned out to be way more complicated than I thought! I got a velvety fabric for it and eventually figured it out enough to pass for a vest!

dsc06958
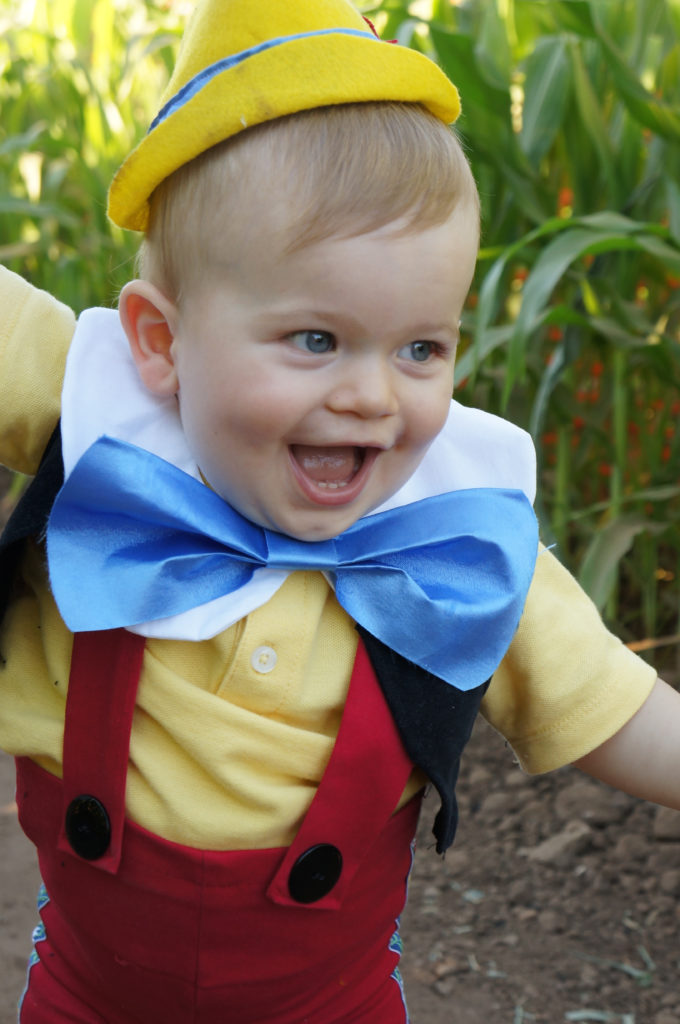
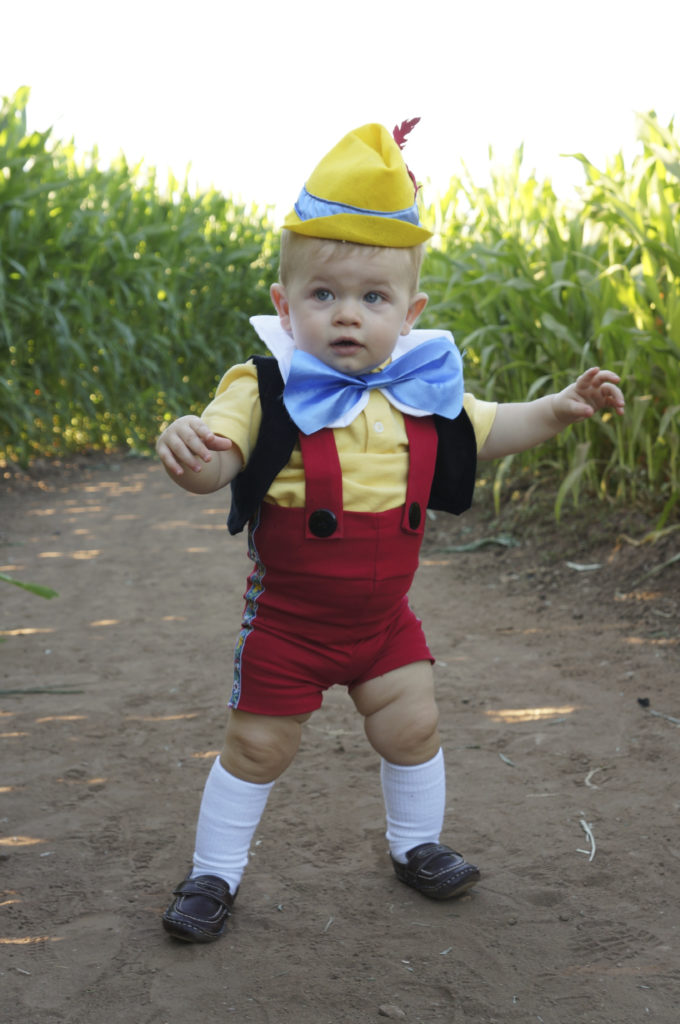
(He just barely learned how to walk on his own the week we took these pictures! I love his mummy walk with his outstretched arms as he’s trying to balance!)

The lederhosen was rather humorous as well.. I learned this year that for pants, you cant just sew straight lines down. I now always know you have to curve it in to account for crotch and bum! Needless to say, I had to redo these several times and then it got too low on top, so I had to attach another strip of fabric (because of course I only got enough fabric to do it once and did not account for any redos!). It’s always a learning process! 😉
 
dsc06973

I finally got the size right where his hind end and juicy belly all fit inside, I sewed strips of fabric to the front with buttons, criss-crossed the straps in back and attached them to the shorts with elastic to allow extra stretch. I sewed ribbons down the sides of the shorts– the ribbons were a special touch because they were ribbons I got in Switzerland when I was little and traveled there with my family.dsc07614

And tada! Pinocchio’s a real boy!!

Ironically, I was Snow White just like his cousin that year (not homemade…i actually made a “blue fairy” costume, or attempted to make that is… i was unsuccessful…Good thing I had a back up Snow White costume!)! And Jesse, most likely, went as a dentist. haha! don’t worry I eventually convince him to join in on the fun.. 😉


Apple Pie Frankie Shake

dsc05642

I’m always trying to find ways to make food fun for my kids. My son particularly loves green shakes or drinks, just because I call them “green monster” drinks! He was rather pleased with this different green shake, this time a “Frankie Shake”. 😉 Before filling it with the cold liquid, use a dry-erase marker to draw a silly face on the glass jar or cup. And this drink really is a Frankenstein green color, although unfortunately the color got washed out in the pictures. 🙁

dsc05653

When I gave this drink to the hubby to taste test (and without saying the name or any ingredients in it), he seemed a bit puzzled and said, “This reminds me of something….” When he couldn’t quite put his finger on it I suggested “…apple pie?” “Yes! That’s it!” BOOM! shacka-lacka! I consider that a success.

Apple Pie Frankie Shake
 
A tasty breakfast shake reminiscent of apple pie and ice cream and with a festive Frankenstein color!
By:
Ingredients
  • ½ cup apple cider or juice*
  • ½ cup milk (any kind- dairy or non dairy)
  • 1 apple, peeled and cored**
  • 2 dates, pitted
  • 1 Tbsp chia seeds
  • ½ tsp vanilla extract
  • ½ tsp cinnamon
  • large handful of fresh spinach
  • handful of ice
Instructions
  1. Very difficult--- Put all ingredients into the blend and blend away! 😉
Notes
*Originally I had the recipe as 1 cup milk and no cider, but when testing it I ran out of milk and put apple cider in, and all taste testers in the house concurred that it tasted even better! So if you don't have cider, it will still taste great with all milk! If using all milk, you can add an extra date if more sweetness is desired, since the apple cider adds sweetness on its own.

**I've tried with unpeeled apples, and trust me, I don't like unnecessary steps but this does make a difference! With the peel it just has a bit of a strange texture and tastes a bit too fibery for my taste..

If you would like to turn this into a dessert shake-- omit the ice and chia (unless you want extra protein) and add a large scoop of vanilla ice cream!


Talane’s Oatmeal Pancakes

dsc05569

When I lived in Pennsylvania, I had a friend that was my best buddy. She would pick me up often and we would go to costco and trader joe’s together, or to joanns and just look at the pretty fabrics. It was quite a mutual relationship as I so desperately needed a friend and she wanted a friend as well. Part of the way she would lure me over to her house in the morning was by inviting me over for breakfast, and then somehow we would end up spending the whole rest of the day together! Ah, the days of having just child, and one that was so easily entertained and content to spend time just chilling in his car seat! Whole wheat waffles, puffed oven pancakes and these oatmeal pancakes were her specialties. And if you know me, I love a good breakfast, so I was very easily lured over! We both moved away and sadly we have only seen each other once since those days in Philly 7 years ago, but Talane still lives on as these have become a staple in our house!

Talane's Oatmeal Pancakes
 
These are pancakes that you can make any day of the week! Because unlike traditional pancakes, these are more nutritious ones filled with cinnamony goodness! Make sure to read the extra notes at the bottom for other options and also to adapt them for gluten-free, egg-free, dairy-free diets. These are adapted from a recipe given to me from my friend, Talane. <3
By:
Ingredients
  • 1 cup quick-cooking oats*
  • ½ cup whole wheat flour
  • ⅛ tsp salt
  • ½ tsp baking powder
  • ½ tsp baking soda
  • ½ tsp cinamon
  • 1 Tbsp sugar
  • 1 egg
  • ¼ cup plain yogurt**
  • ¾ cup milk
  • 2 Tbsp oil
  • Topping options: bananas and maple syrup (my favorite), pears, sauteed apples, etc
Instructions
  1. Mix the dry ingredients together with a fork.
  2. Crack the egg right into the same bowl, add the milk and oil, and use the fork to beat the egg and mix it all together with the dry.
  3. Heat your griddle to 375 degrees and when hot, grease or spray the griddle and scoop/pour out the batter into small circles (I love that the entire batch of batter will all fit on my griddle at once! It usually makes 8-10 small pancakes)
  4. Add toppings if desired.
Notes
*I've used regular oats before, and surprisingly it really does make a difference! Quick oats are the winner.

**If you don't have yogurt you can leave it out and just increase milk to 1 cup and add 1 tsp vinegar.

To make it gluten-free (or just to switch it up!)-substitute buckwheat flour for the whole wheat. Or you can also sub with gluten-free flour blend.

To make it dairy free- replace the yogurt and milk with any alternative milk (so 1 cup total). My favorite with these is almond milk, but it will work great with any.

To make it egg-free, make a flax egg: 1 Tbsp ground flax mixed with 3 Tbsp water. Let sit a minute or two and then combine with wet.

Ironically, I'm allergic to oats. So even with all the allergy-friendly alternatives I still can't eat them any more! Ha! So sad! But the hubby and kids still get to enjoy them. And all of you need to make them and enjoy them for me. 🙂


Strawberry Chia Pudding

2016-10-12-01-51-15

I love a good dessert. This strawberry chia pudding is one I turn to over and over again, so I figured I better post it and share it with others! My sister sent it to me a few years ago from thekitchn and this treat, along with a chocolate pudding I make (made with avocados), are my “healthy”(er) desserts that I love. They are also my favorites to make when I am expecting company because they are a bit unusual and fit my food point of view, taste so good, and can be made in advance (and require very little work).

2016-10-12-01-53-14

Another reason this recipe is so good is that it is very allergy-friendly! Unless you are allergic to coconut that is (sorry ava, sniff sniff!). It is naturally sweetened with honey and a bit of agave and it gets that full creaminess from the canned coconut milk. I usually top it with strawberries, kiwis, or mangoes, and sometimes I like to add coconut flakes too. Aaaand, if you happen to have some left over, it might be good for breakfast (just saying hypothetically, of course 😉 ). Enjoy!

Strawberry Chia Pudding
 
This is my go-to dessert. Quick to put together, nutritious, and delicious! This recipe is adapted from Strawberries & "Cream" Chia Pudding from www.thekitchn.com
By:
Serves: 6
Ingredients
  • 16 oz. strawberrries*
  • 1 13-oz can coconut milk
  • ¼ cup honey
  • 2 Tbsp agave**
  • 1 tsp vanilla extract
  • zest of 1 lime
  • ½ cup chia seeds
  • optional toppings- strawberries, kiwis, mangoes, coconut flakes, etc
Instructions
  1. Place all the ingredients except the chia seeds into a blender and blend until smooth.
  2. Put the chia seeds into a large bowl and pour the strawberry mixture on top.
  3. Whisk it all up and let it sit for 10 minutes.
  4. Whisk again and then cover and refrigerate for at least 4 hours.
  5. Stir the pudding before serving and add toppings if desired.
Notes
*I usually use a 16-oz bag of frozen strawberries and stick it in my fridge the day before to defrost!

**If you want to use all honey or mix it up with agave or maple syrup, go for it! This is just the way I do it and prefer it. To make it vegan, use only agave or maple syrup.

If you are specifically wanting to make this for breakfast (this would certainly make my morning joyous), I would cut down the sweetener by half! Unless you are just eating up the leftovers, of course. 🙂

This recipe is adapted from Strawberries & "Cream" Chia Pudding from www.thekitchn.com


4 Comments
POSTED IN:


Halloween Costumes 2011- Cat and Mouse

dscn6599
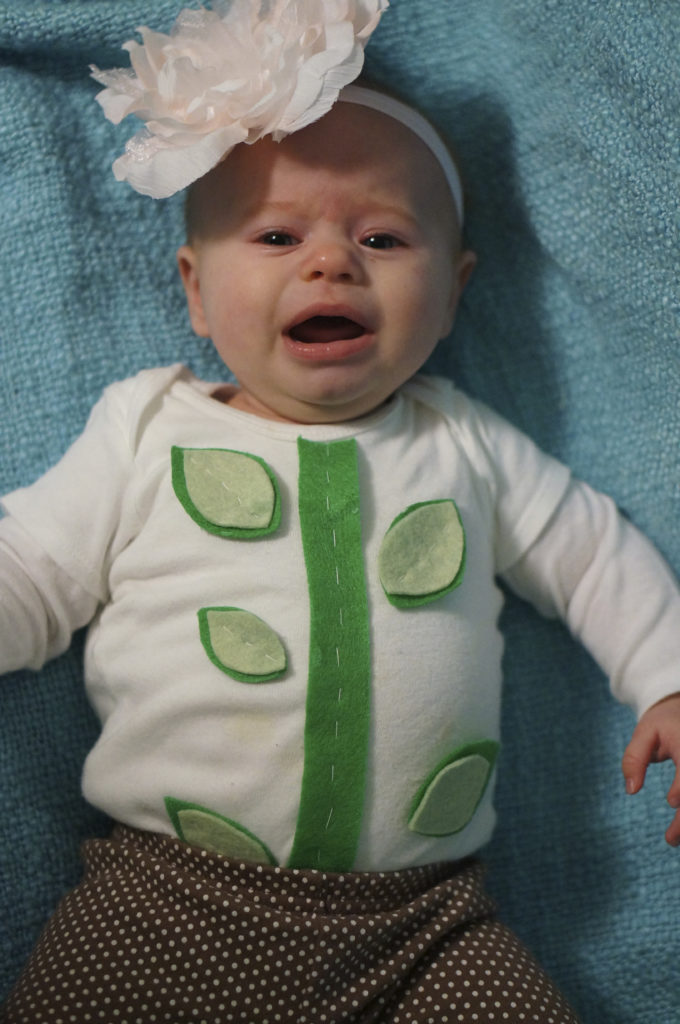
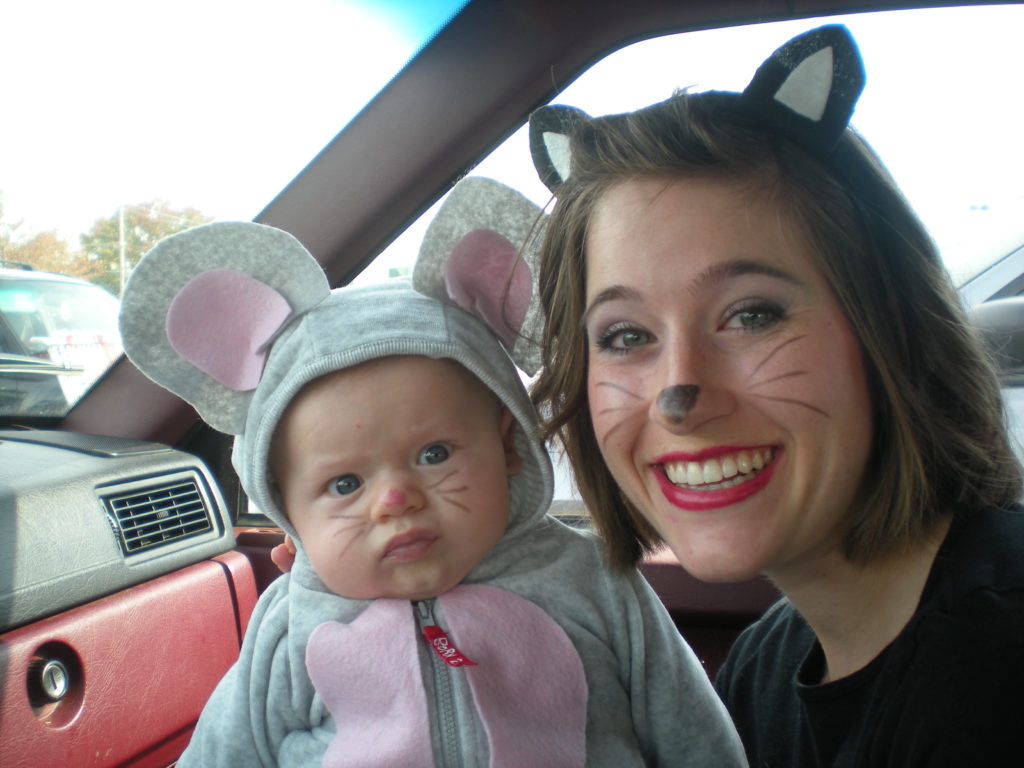
Halloween 2011 involved a new addition to a family, and with a baby at not-yet 3 months, I had to pull together a very last minute costume that involved minimal work. Thus: Cat and  Mouse!dscn6612The Little Bug already had this gray jogger suit with a hood. It actually had little bear ears on top, and I discovered that double sided tape sticks surprisingly well to felt and I just cut some gray and pink, made little slits to curve it in, and then taped it to the original ears.  dscn6615
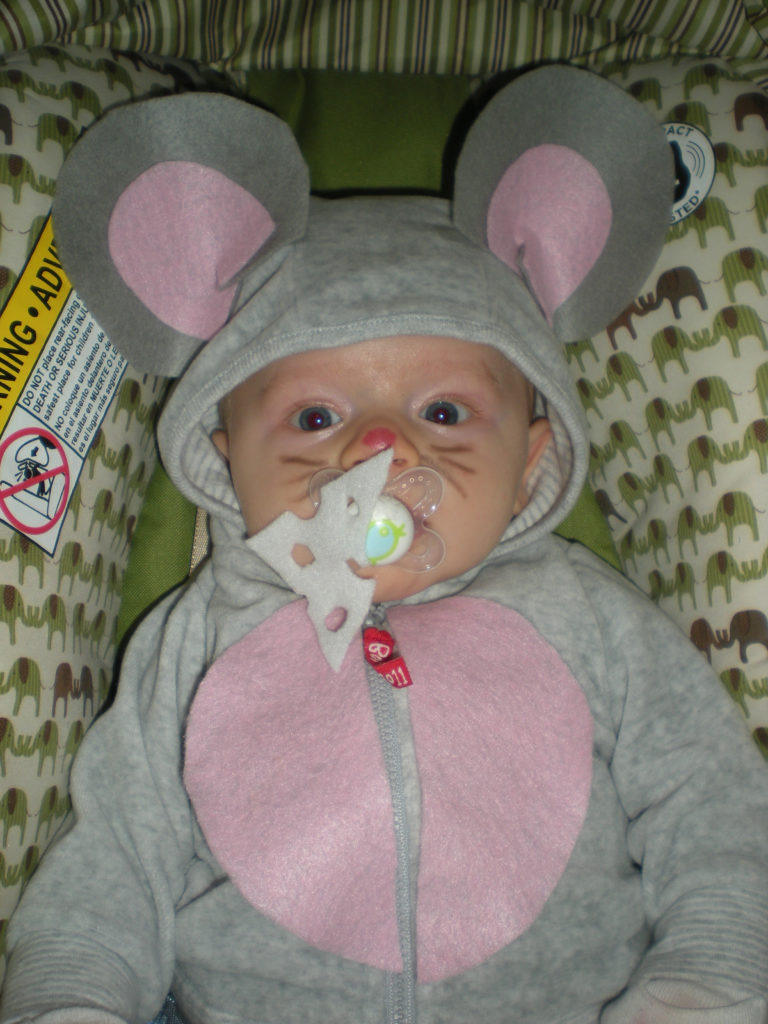
And really, isnt the piece of (felt) cheese on the binky just the cherry on top? bah! i love it! a pink felt belly, a pink nose and some drawn whiskers finished off his costume!

dscn6597
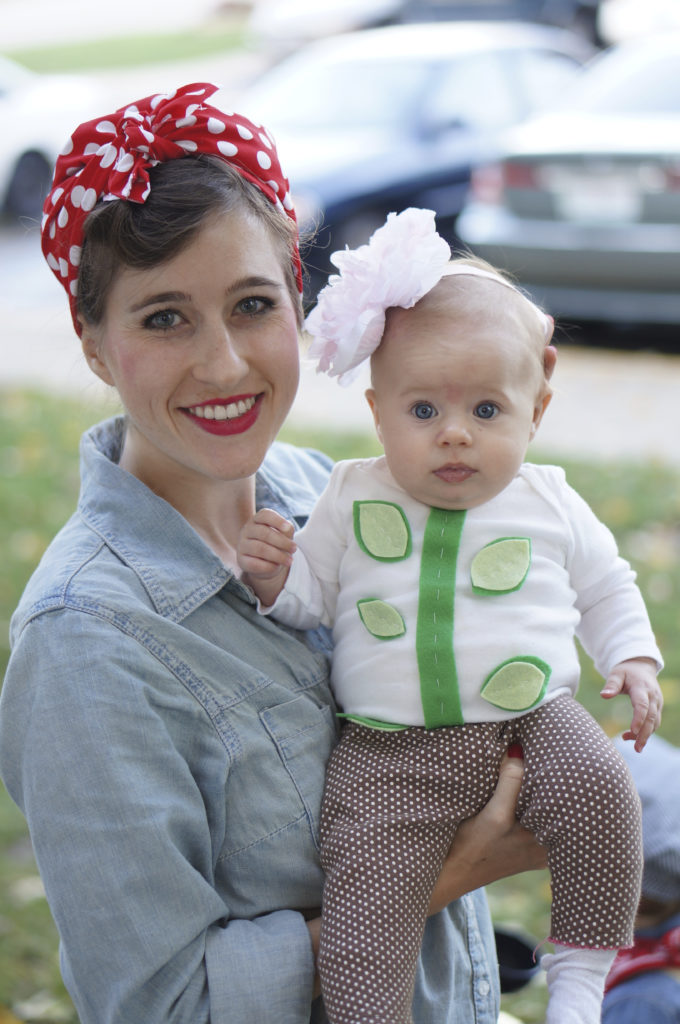
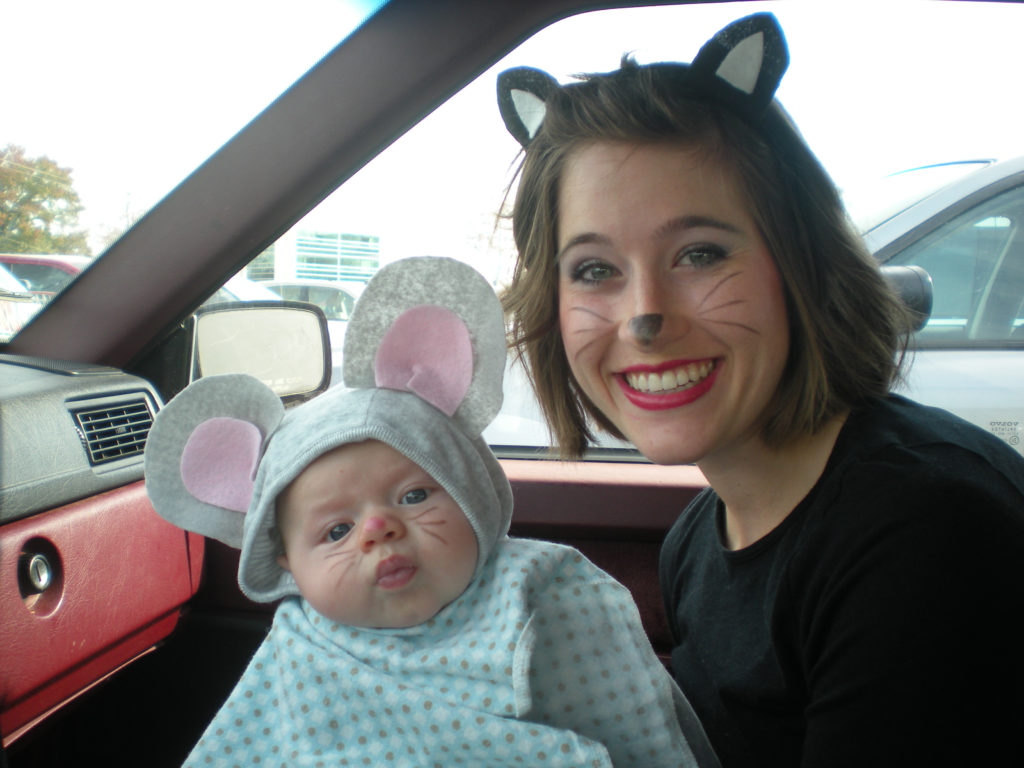
Now my costume was very complicated…. 😉 black yoga pants, black shirt, I cut some black and white felt and folded it over a black headband I already had for cat ears, black nose and whiskers. and red lipstick. because I love red lipstick. dscn6598
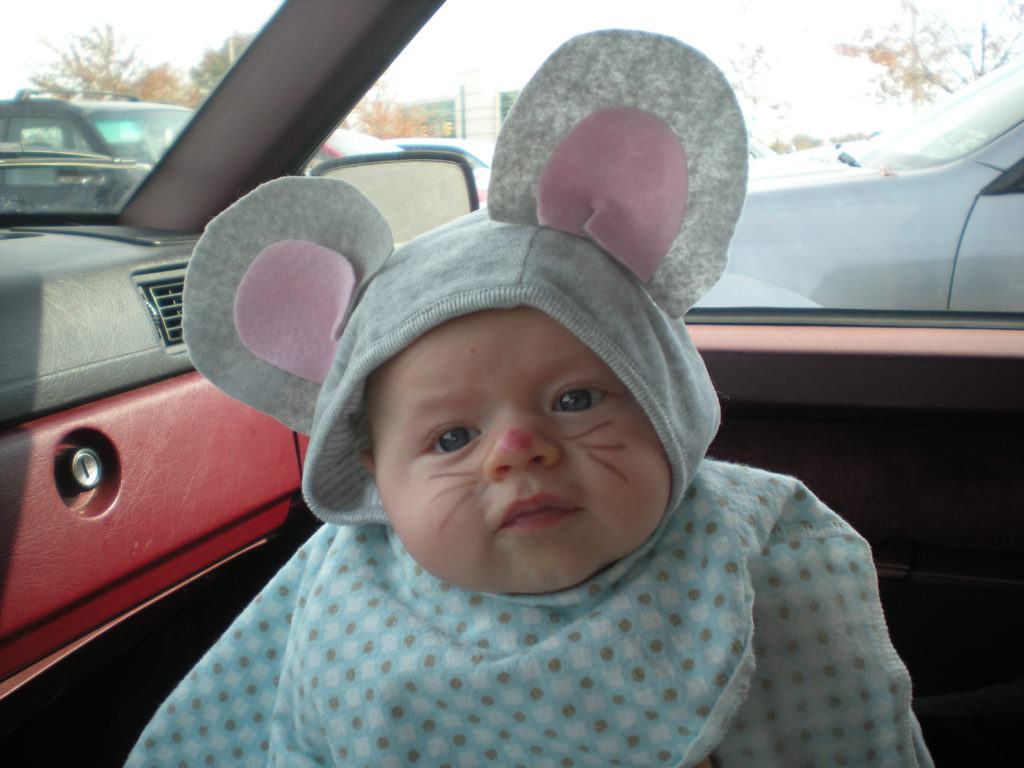
Jesse must have been a “dentist” that year for Halloween (since I cant seem to find any pictures of him!), quite original. 😉 The fall back is either dentist or chef! Haha! But I loved having a coordinating costume with my little buddy as we ran errands together on Halloween! It doesn’t have to take much time or money to make it fun, just a little bit of thought. Although the following year i did take a bit more time on his costume… stay tuned!


Zucchini Pasta Sauce

Every Friday night growing up, my parents would go out on a date.  This was our night as kids to make what we wanted for dinner, pop popcorn, and watch a movie! We called it our Friday Night Party! Our typical dinner fare (only for a Friday night) was Kraft mac and cheese with peas mixed in or Chinese take-out, but sometimes we got a bit more creative in the kitchen.  I remember my brother being especially adventurous and decided he wanted to lead us in making homemade ravioli, having never made them before.  Now, ravioli is not something you whip up real quick, it takes a lot of work and time! I think we were all starved by the time we sat down at 9 that night to finally eat our dinner! 2016-09-02-03-44-13 When it was just me and my sister left at home, I remember us slicing and cooking zucchini in the microwave and topping with parmesan, or feeling really fancy when we would saute an onion and carrot to add to our jar of Ragu pasta sauce.  It sure makes us laugh now thinking how gourmet we thought we were!  Later, we really stepped it up and created this pasta sauce from scratch that quickly became a favorite. It still is one of my favorites!
Zucchini Pasta Sauce
 
A quick and simple pasta that highlights summer's zucchini!
By:
Ingredients
  • 2 Tbsp olive oil
  • 1 onion, diced
  • 3 carrots, diced (or grated if short on time--it will cook faster!)
  • 2 zucchini, quartered and sliced
  • 3 cloves garlic, minced
  • 1 tsp salt
  • ¼ tsp pepper
  • 1 28 oz can crushed tomatoes (or can use diced or mashed up whole tomatoes)
  • 1 tsp sugar
  • parmesan (optional, for topping)
Instructions
  1. Heat a large saute pan with the oil and add the onion, carrots, zucchini and garlic, seasoning with salt and pepper, and cook until the onion is translucent.
  2. Add the crushed tomatoes and sugar and let it simmer until the carrots are tender and the sauce has thickened.
  3. Check for seasonings and add more salt or pepper if needed.
  4. Serve with shaped pasta* (I like it with penne, bowtie, or rigatoni) or cooked spaghetti squash.
Notes
* My favorite gluten-free noodles are made with brown rice and quinoa.

-This sauce is very simply seasoned that I enjoy as is, but you may also add basil, dried oregano, etc if you desire!

-My mom's secret was to add a chicken bouillon cube to pasta sauces! It really does give it a lot of flavor, so if you have that in your pantry, you can throw it in with the sauteeing veggies before you add the tomatoes (make sure you decrease salt significantly since those little cubes usually pack in a lot of salt already!), I did not include it in the recipe just because I personally no longer use them any more.